Welcome to the Wifi Panorama Camera user manual. Thank you for purchasing this advanced surveillance device. This guide will help you master its features and ensure optimal performance.
1.1 Overview of the Wifi Panorama Camera
The Wifi Panorama Camera is a cutting-edge surveillance device designed to provide 360-degree panoramic vision, ensuring comprehensive coverage of your space. With advanced features like electronic PTZ mode, panorama mode, and night vision, it delivers high-quality HD video streaming. Its Wi-Fi connectivity allows seamless integration with your network and remote monitoring via a mobile app. Perfect for both home and professional use, this camera offers enhanced security, flexibility, and ease of use, making it an excellent choice for modern surveillance needs.
1.2 Purpose of the Manual
This manual is designed to guide you through the installation, configuration, and operation of the Wifi Panorama Camera. It provides step-by-step instructions for setting up the device, connecting it to Wi-Fi, and utilizing its advanced features. The manual also includes troubleshooting tips and best practices for securing your camera. By following this guide, you will be able to maximize the camera’s functionality and ensure a secure, optimal surveillance experience. Refer to this manual for any questions or issues during setup and operation.
System Requirements
Ensure your router supports 2.4GHz Wi-Fi, and your device has a stable internet connection. A compatible smartphone and power supply are also required for setup.
2.1 Compatible Devices and Browsers
The Wifi Panorama Camera is compatible with Android 5.0+ and iOS 10+ devices. Supported browsers include Chrome, Firefox, Safari, and Edge. Ensure your smartphone or PC has the latest browser version installed for optimal performance. The camera also works seamlessly with its dedicated mobile app, available for download on the App Store and Google Play. For the best experience, use a modern web browser and keep your device updated. Check the official website for the most current list of supported devices and browsers.
2.2 Network Requirements for Optimal Performance
A stable internet connection with a minimum upload speed of 2 Mbps is recommended for smooth operation. The camera supports 2.4 GHz and 5 GHz Wi-Fi bands, ensuring compatibility with most modern routers. For optimal performance, ensure the camera is placed within a strong signal range and avoid obstacles that may interfere with connectivity. Use a Wi-Fi password without special characters to prevent pairing issues. Additionally, ensure your router is configured to prioritize video streaming traffic to minimize latency and ensure uninterrupted monitoring. Regularly update your router’s firmware for enhanced performance and security.
Installation and Setup
Welcome to the installation section. Follow these steps to set up your Wifi Panorama Camera. Begin by downloading the app, then press the Wi-Fi button to activate the camera module. Ensure your device and camera are close during setup. Refer to the detailed instructions in the following sections for a seamless experience.
3.1 Downloading and Installing the Mobile Application
To begin, visit the official website or app store to download the dedicated mobile application for your Wifi Panorama Camera. For example, download the MiJia Panorama Camera app or Reolink Client. Once downloaded, install the app on your smartphone or tablet. Open the app, create an account or log in if you already have one. Follow the in-app instructions to connect your camera to the app. Ensure your device and camera are nearby during this process for a smooth setup experience.
- Go to the official website or app store.
- Download and install the camera’s app.
- Launch the app and create an account.
- Follow in-app instructions to connect your camera.
3.2 Physical Installation of the Camera
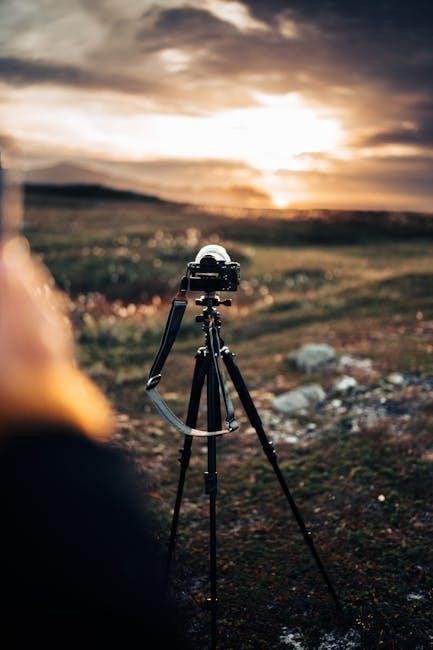
Mount the Wifi Panorama Camera in a desired location, ensuring a clear field of view. Connect the power adapter to the camera and plug it into a nearby outlet. Locate the Wi-Fi button, press it briefly to activate the camera’s Wi-Fi module. Position the camera to capture the widest possible angle for panoramic viewing. Ensure the camera is in Internet mode to establish connectivity. Secure the camera firmly to avoid any movement or vibrations during operation.
- Mount the camera in your preferred location.
- Connect the power adapter and press the Wi-Fi button.
- Position for optimal panoramic coverage.
- Ensure stable installation to prevent movement.
Connecting the Camera to Wi-Fi
Power on the camera and press the Wi-Fi button to activate the module. Ensure your mobile device and camera are nearby. Open the app, select the camera’s Wi-Fi network, and enter the password. Ensure the Wi-Fi name and password do not contain special symbols for seamless connectivity. Follow in-app instructions to complete the connection.
4.1 Initial Wi-Fi Setup Process
To begin, ensure the camera is powered on and the Wi-Fi module is activated by briefly pressing the Wi-Fi button. Open the downloaded mobile app and select the camera’s Wi-Fi network from the available options. Enter the default password provided in the packaging or manual. Once connected, the app will guide you through configuring the camera’s network settings. Ensure the mobile device and camera are in close proximity during this process to establish a stable connection.
4.2 Troubleshooting Wi-Fi Connection Issues
If the camera fails to connect to Wi-Fi, ensure the password is entered correctly and avoid special symbols. Restart both the camera and your router. Verify that the camera and mobile device are in close proximity. Check that the Wi-Fi network name matches and the camera is in Internet mode. If issues persist, reset the Wi-Fi by holding the Wi-Fi button for 5 seconds and retry the connection process. Consult the manual or contact support for further assistance if problems remain unresolved.
Configuring Remote Access
Configure remote access to monitor your Wifi Panorama Camera from anywhere. Enable remote monitoring in the app and set up cloud-based storage for secure, real-time access.
5.1 Enabling Remote Monitoring
To enable remote monitoring, launch the mobile app and log in to your account. Tap the Settings icon, then select Remote Access. Ensure your camera is connected to the internet and Cloud P2P is activated. Follow in-app prompts to complete the setup. This feature allows live viewing and receiving notifications on your smartphone, ensuring constant surveillance of your space, even when you’re not physically present. Verify all settings and test connectivity for seamless remote access.
5.2 Setting Up Cloud-Based Storage
To set up cloud-based storage, log in to the mobile app and navigate to the Settings menu. Select Cloud Storage and choose your preferred subscription plan. Follow the on-screen instructions to activate the service. Ensure your camera is connected to the internet and that cloud storage is enabled. This feature allows automatic video storage and remote access to recorded footage, enhancing security and convenience. Verify the setup by checking if recordings are saved to the cloud and accessible via the app.
Advanced Features
Explore advanced functionalities like panoramic viewing, PTZ controls, and customizable modes. These features enhance monitoring capabilities, offering a seamless and personalized surveillance experience for users.
6.1 Using Panoramic and PTZ Modes
The Wifi Panorama Camera offers panoramic and PTZ (Pan-Tilt-Zoom) modes for enhanced surveillance. Panoramic mode provides a 360-degree view, while PTZ allows manual or automatic adjustment of the camera’s angle and zoom. Access these modes via the app, enabling features like bowl mode for focused coverage or corridor mode for hallway monitoring; Customize viewing angles for specific areas and switch modes seamlessly for dynamic monitoring. Ensure a stable internet connection for smooth operation and explore these advanced features to maximize your camera’s potential.
6.2 Customizing Viewing Angles and Modes
Customize your camera’s viewing angles and modes to suit your surveillance needs. Use electronic PTZ mode for precise zoom and pan controls. Switch to bowl mode for focused coverage or corridor mode for hallway monitoring. Split mode allows multiple viewing angles simultaneously. Adjust settings via the app to optimize your camera’s field of view. Schedule mode changes or set custom presets for different scenarios. Ensure a stable internet connection for smooth operation and explore these features to enhance your surveillance experience.

Security and Maintenance
Regularly update firmware and use strong passwords to secure your camera. Enable encryption for data protection. Clean the lens and check for software updates to maintain performance.
7.1 Updating Firmware and Software
Regular firmware updates are essential for optimal performance and security. To update, log into your camera’s web interface and navigate to the “System” or “Settings” menu. Check for available updates and follow on-screen instructions to download and install the latest version. Ensure the camera remains powered on during the update process. Updating firmware enhances security, adds new features, and fixes bugs. Always verify updates are from official sources to prevent unauthorized access.
7.2 Best Practices for Securing Your Camera
To ensure your Wifi Panorama Camera remains secure, always use a strong, unique password and enable WPA3 encryption for your Wi-Fi network. Regularly update firmware to patch vulnerabilities. Disable unnecessary features like remote access when not in use. Limit camera access to trusted devices and users. Use a VPN for remote monitoring to protect data transmission. Avoid placing cameras in sensitive areas without proper privacy settings. Monitor camera activity and review logs for unusual behavior. Enable two-factor authentication for added security.
Troubleshooting Common Issues
Resolve connectivity or performance issues by restarting the camera and router. Check Wi-Fi signal strength and ensure firmware is up to date for optimal functionality.
8.1 Resolving Connectivity Problems
If your camera disconnects frequently, restart the device and router. Ensure the camera is in the correct network mode (Local or Internet). Check the Wi-Fi signal strength and move the camera closer to the router if necessary. Verify that the Wi-Fi password is entered correctly and avoid special symbols. Consult your router’s settings to ensure proper configuration. If issues persist, reset the camera to factory settings and restart the connection process. Ensure firmware is updated for stable performance. Refer to the manual or contact support for further assistance.
8.2 Understanding Indicator Lights and Status
The camera features indicator lights to show its current status. A steady red light indicates power is on, while a blinking red light signals a malfunction. The blue light shows Wi-Fi status: steady for connected, blinking for connecting, and off for disconnected. A green light indicates recording is active, while off means it is inactive. If the lights behave unusually, refer to the manual or contact support to resolve issues promptly. Understanding these indicators helps ensure smooth operation and troubleshooting of your Wifi Panorama Camera.
9.1 Final Tips for Optimal Use
To ensure the best performance of your Wifi Panorama Camera, always keep the firmware updated and maintain a stable internet connection. Regularly clean the lens for clear footage and adjust the viewing angles as needed. Use the remote monitoring feature for convenience and enable cloud storage for secure video backups. Periodically check the camera’s physical installation to avoid any misalignment. For troubleshooting, refer to the dedicated section or contact support for assistance. Happy monitoring!
9.2 Contact Information for Support
For any inquiries, troubleshooting, or assistance, please visit our official website at https://reolink.com/support. You can also reach us via email at support@reolink.com or call our toll-free number at 1-800-REOLINK (North America) or +44-20-3808-5555 (Europe). Live chat is available on our website during business hours. Our support team is here to help you with any questions or concerns about your Wifi Panorama Camera. Office hours: Monday-Friday, 9 AM-6 PM (GMT-5 for North America, GMT+1 for Europe).